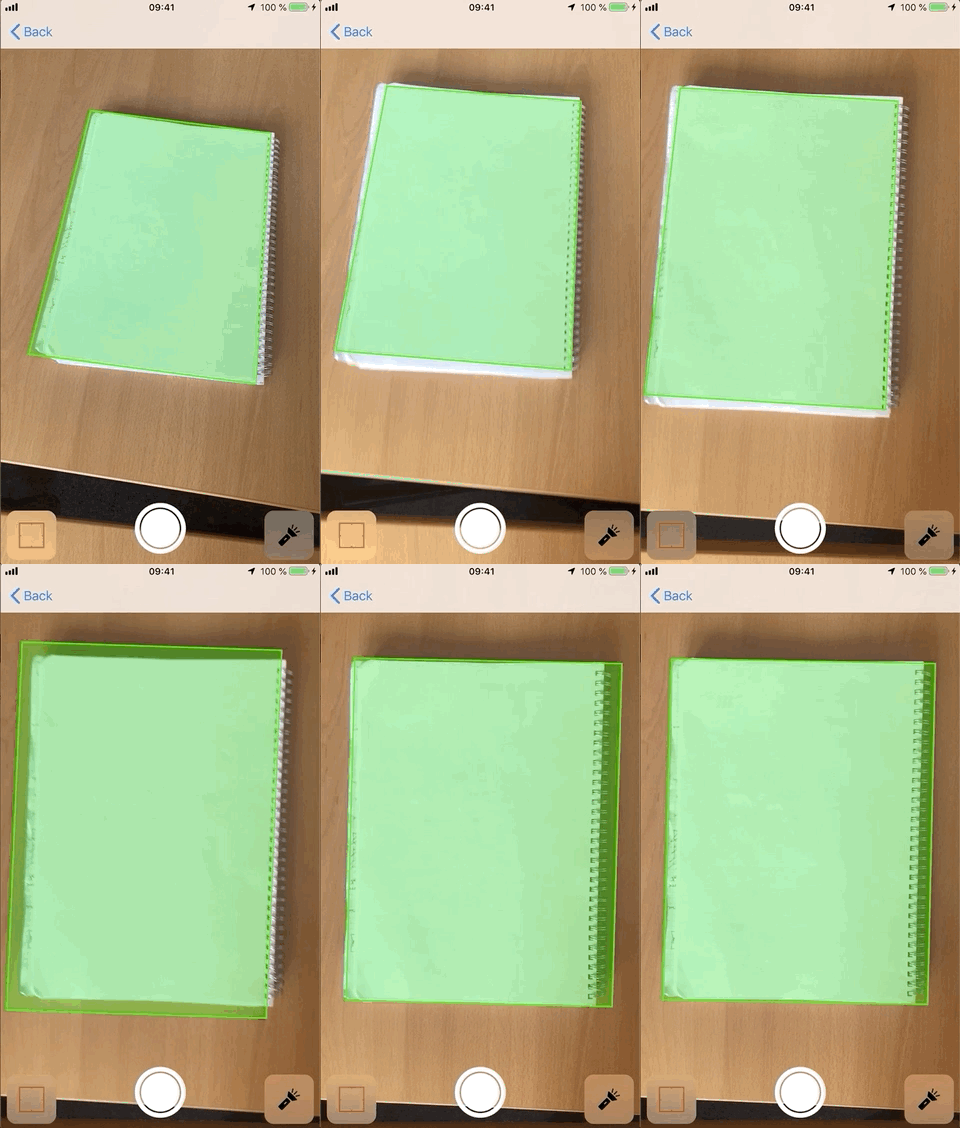
This pod contains a ready to use view controller for document scanning. Yes we scan!
iOS 13 contains the VNDocumentCameraViewController, which is an
Apple-provided class that is likely to achieve better results and have less bugs
than this pod.
If your app is targeting iOS 13 or higher, please consider using it instead of this pod.
- iOS 10.0 SDK or later
| Xcode Version | YesWeScan |
|---|---|
| <= 10.1 | <= 1.3.0 |
| >= 10.2 | => 2.0.0 |
YesWeScan is available through CocoaPods.
To install it, simply add the following line to your Podfile:
pod 'YesWeScan', ~> '2.0'YesWeScan is also available via Carthage.
Add the following line to your Cartfile:
github "adorsys/YesWeScan"
Starting in version 2.2.0, Swift Package Manager is also supported 🎉
Add it to your project like this:
dependencies: [
    .package(url: "https://github.com/adorsys/YesWeScan.git", from: "2.2.0")
]The scanner needs access to the camera.
In order to allow this, your Info.plist must contain the NSCameraUsageDescription key.
The main class in this project is ScannerViewController. You can access it
with import YesWeScan.
import YesWeScan

class ViewController: UIViewController {
  var scannedImage: UIImage?

  override func viewDidLoad() {
    super.viewDidLoad()

    let scanner = ScannerViewController()
    scanner.delegate = self
    navigationController?.pushViewController(scanner, animated: true)
  }
}The scanner will not capture images without a delegate.
You should therefore set the delegate property of the ScannerViewController.
You will then receive calls when the scanner found an image of suitable quality:
extension ViewController: ScannerViewControllerDelegate {
  func scanner(_ scanner: ScannerViewController, didCaptureImage image: UIImage) {
    scannedImage = image
    navigationController?.popViewController(animated: true)
  }
}You can customize the scanner's accuracy using the jitter property. Higher
values will make it easier to capture an image, but it won't be as steady.
The default value here is 100.
The Scanner resolution can be configured by passing the ScannerViewController
an AVCaptureSession.Preset during initialization. The default value is
.high. If the given preset isn't supported by the capture device, it'll fall
back to the default value.
You can change the variable scanningQuality to control the scanning quality
of the image. Changes to scanningQuality will influence the number of
features required before taking a capture.
enum Quality {
  case high, medium, fast
}
The default value is .medium and this variable is available
in ScannerViewController.
scanner.scanningQuality = .fastThe scanner's UI can be configured using the initializer:
ScannerViewController(config: [.torch, .manualCapture])The following options are available:
.targetBraces: A button to toggle targeting braces.torch: A button for controlling the torch.manualCapture: A manual camera shutter.progressBar: Show a progress bar for the current scan
The default value here is .all.
You can also configure the previewColor (color of scan preview rect) and
braceColor (color of the target finder braces).
The defaults here are UIColor.green and UIColor.red, respectively.
The scanner example project supports Siri Shortcuts since iOS 12*. The User own shortcut opens the app and navigates to the Document Scanner. You can find the implementation in the example project.
The implementation works as follows:
Activate Siri in the project and add a NSUserActivityTypes identifier in info.plist.
Then activate Siri Shortcut adding following lines in the project:
if #available(iOS 12.0, *) {
  let identifier = Bundle.main.userActivityIdentifier
  let activity = NSUserActivity(activityType: identifier)
  activity.title = "The String the User will see in preferences"
  activity.userInfo = ["Document Scanner": "open document scanner"]
  activity.isEligibleForSearch = true
  activity.isEligibleForPrediction = true
  activity.persistentIdentifier = NSUserActivityPersistentIdentifier(identifier)
  view.userActivity = activity
  activity.becomeCurrent()
}
To call a specific function, like openDocumentScanner(), add this to AppDelegate:
func application(_ application: UIApplication, continue userActivity: NSUserActivity, restorationHandler: @escaping ([UIUserActivityRestoring]?) -> Void) -> Bool {
  if #available(iOS 12.0, *) {
    guard userActivity.activityType == Bundle.main.userActivityIdentifier,
      let navigationController = window?.rootViewController as? UINavigationController,
      let viewController = navigationController.children.first as? ViewController else {
        return false
    }
    viewController.openDocumentScanner()
    return true
  } else {
    return false
  }
}It's also possible to use the scanner class without the ScannerViewController
class (that is part of this pod) directly.
As an example how to do this, take a look at the CustomUIViewController class.
YesWeScan is released under the Apache 2.0 License. Please see the LICENSE file for more information.


